Fast Blinking Hello Kitty
Showing posts with label guest posts. Show all posts

Sunday, 6 October 2013

Guest post from Shannon "Leopard print nails tutorial"


Hey guys,
so I have been seriously lacking on posts lately. Been busy...blah blah blah, I know. Anyhow, I have a great treat for you guys today. A friend of mine is always posting pictures of her nails on Facebook and I , of course, always noticed them. And I must say she does really nice and amazing mani's. Here's a few from her facebook page...
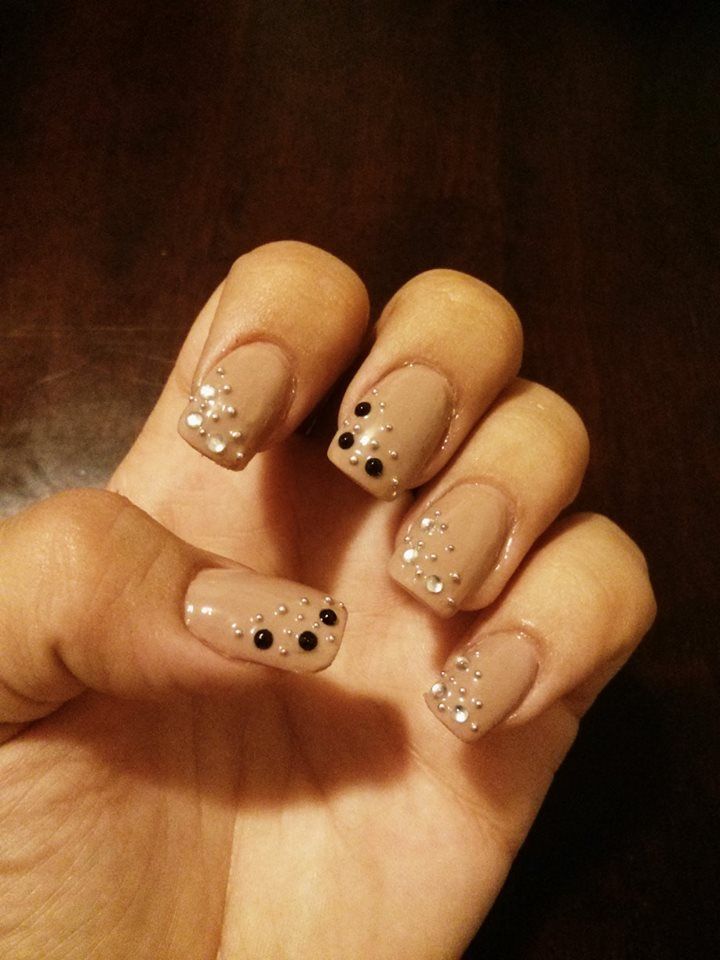
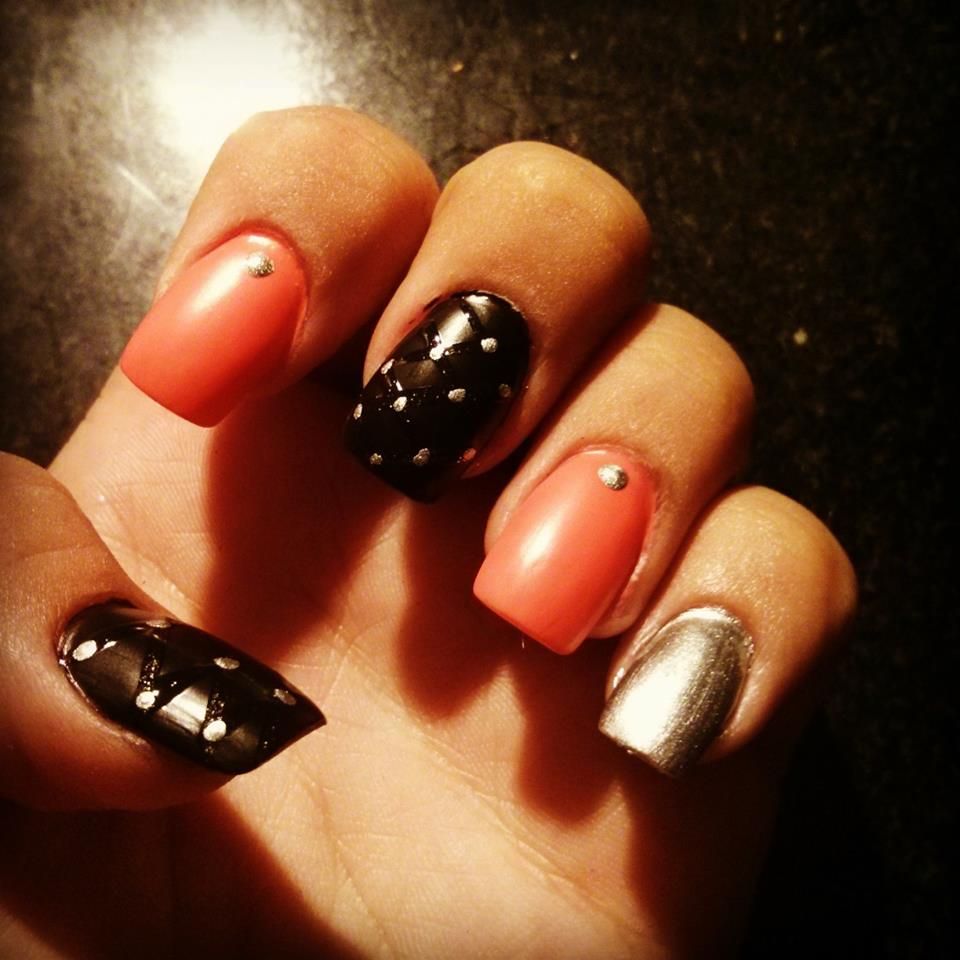
Simple yet elegant mani with rhinestones:) 

I LOVE the look of this one! Just LOVE IT! Great mix of colors and especially love what she did with the black!

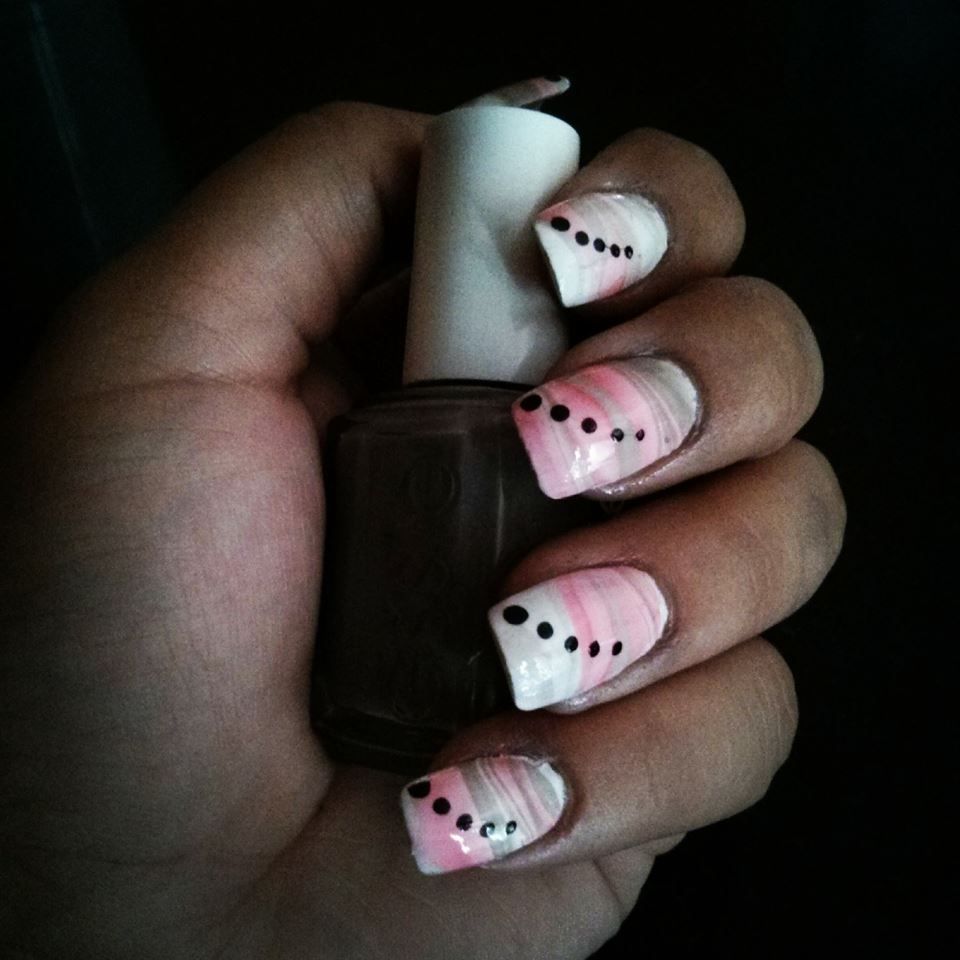
Look at that AWESOME water marble work! I think we need her to give us a tutorial on how she made her look so perfect!!!

Really great stuff eh?!?! Much better than I tend to do, although that is not hard to beat... Shannon is an old friend of mine from high school, she doesn't have a blog (yet...) but says nails are her passion and it shows. So, I asked her if she would like to do a guest post on my blog, just to dip her toes into the blogger world and I am thrilled to say that she agreed, after a bit of convincing:) So, she did a tutorial for me. A leopard print tutorial, which is one I need to follow! SO let's get right to it. All pictures are of Shannon's nails, taken herself and all instructions are her own:)
Let's get to the good stuff:) I leave you in the very capable hands and tips of Shannon from here:)


Leopard print mani tutorial


Hi everyone! okay... So this is my first time doing any sort of tutorials, so hopefully it won't be half bad and some of you will actually enjoy it! Lol. I decided to do leopard print nails today. I'm sure some of you think it looks a little hard but believe me it's actually very simple!
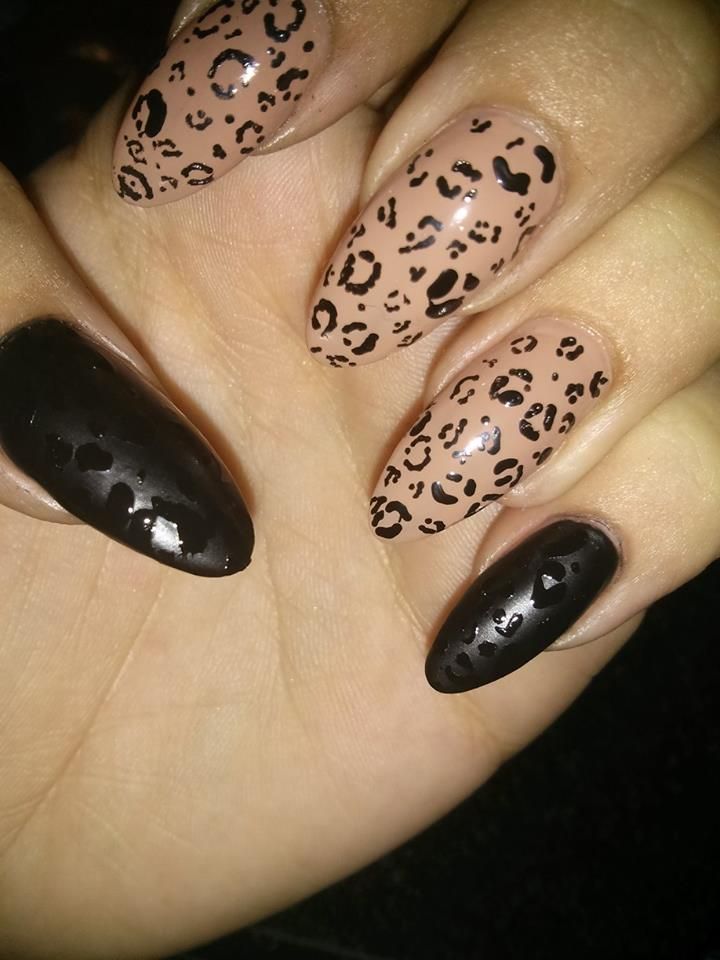
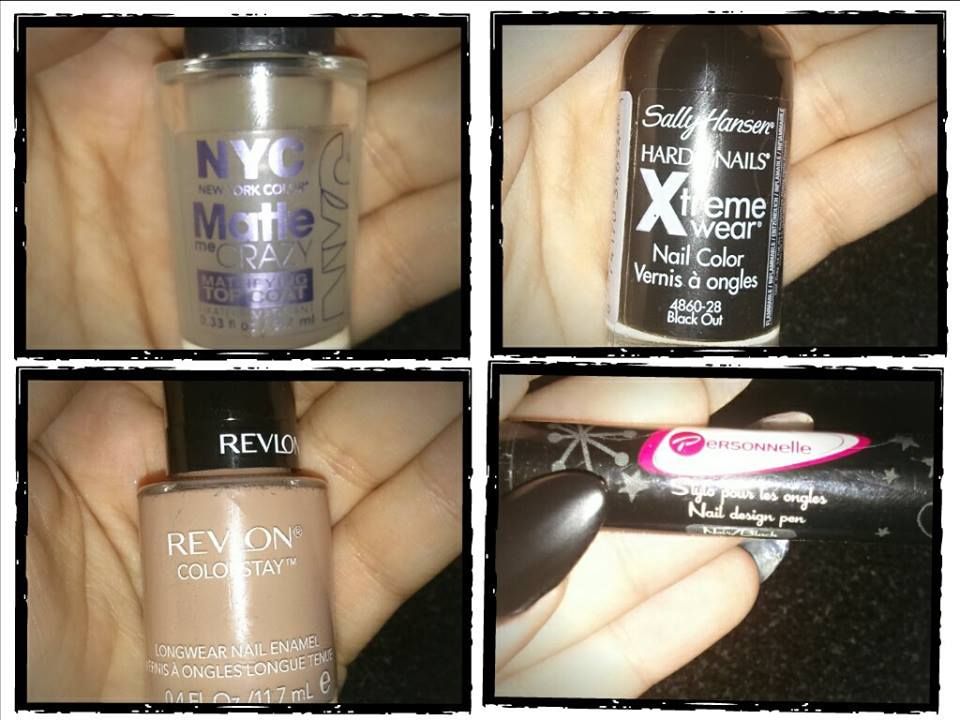
For the first step I applied a base coat to all of my nails before beginning to apply the Polish. As for the colors I used my Revlon Color Stay in Nude Beige, Sally Hansen Hard as Nails Black Out #370, as well I have my NYC Matte me Crazy, along with my Personnelle Nail Design pen in Black.


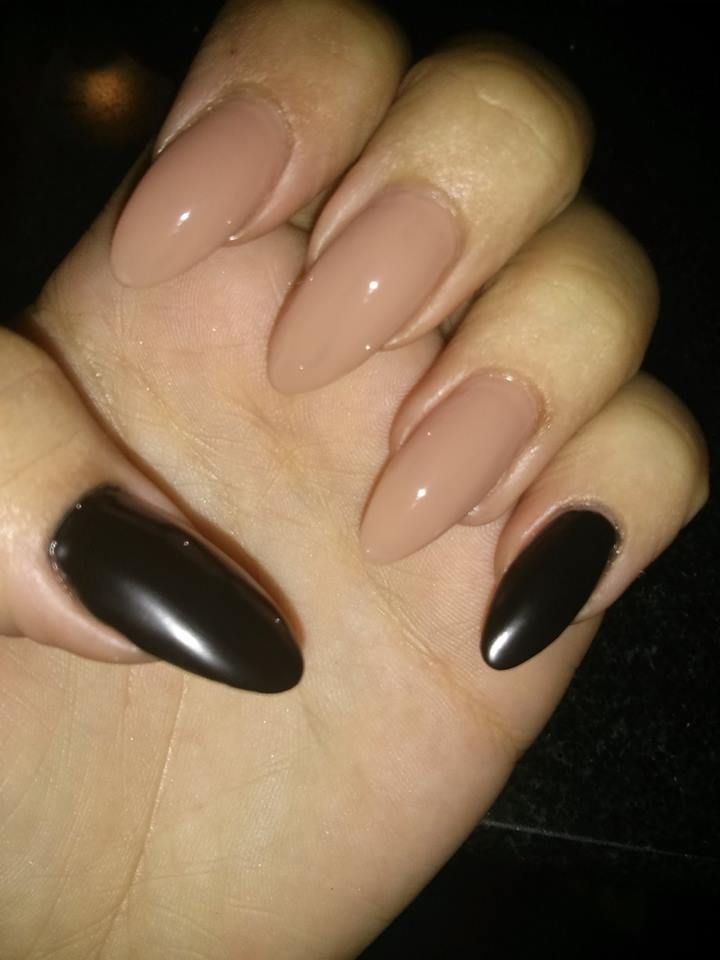
Once my base coat was dry I applied two coats of the Beige to my index, middle and ring finger, and two coats of the Black to my pinky and thumb. Once dried, I applied the Matte top coat to my pinky and thumb.

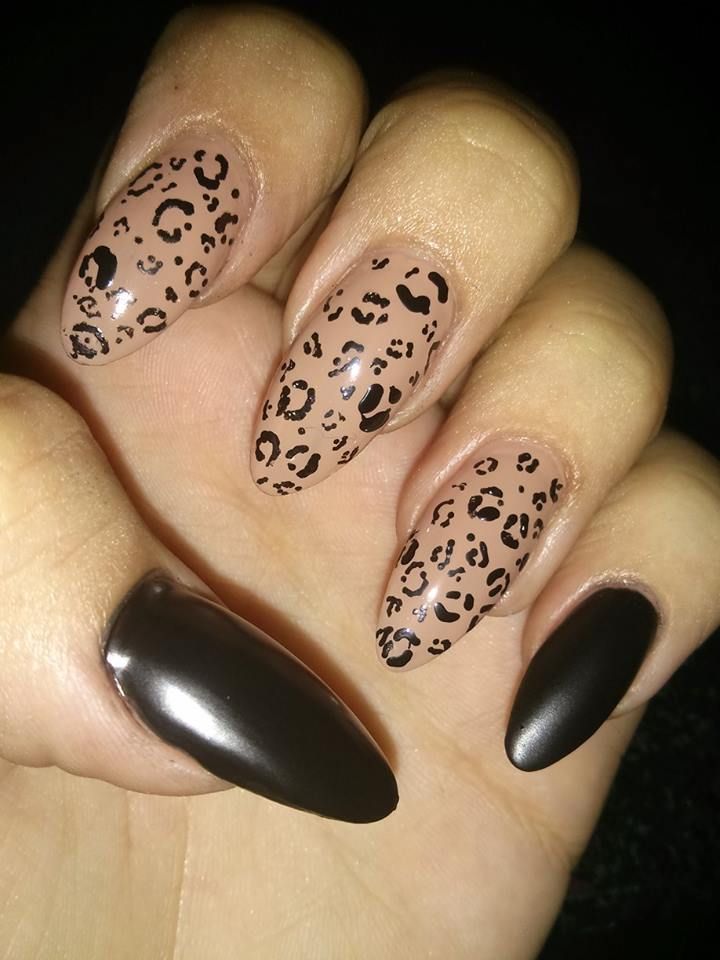
Now for the fun part! For this stuff I used my nail art pen. (Some people prefer a dotting tool or strippers, I just feel I have more control with the pen) I know I know it looks hard right? But its really not... All you have to do is create curved lines mix those up with dots and you're done! I personally prefer to make some bigger than others , but you don't have to. If you're not comfortable doing this directly on your nail polish you can practice on a paper if it's your first time. It should come out looking something like this...

Now that we can be sure that are our black matte nails are completely dry, we can go ahead with either a dotting tool or a fine brush and you're top coat! All I have to do now is dip your brush or dotter into the clear top coat and do the same pattern onto your thumb and pinky nails. I like to make mine a little bit bigger just so that we can see the matte nail polish underneath a little bit better.
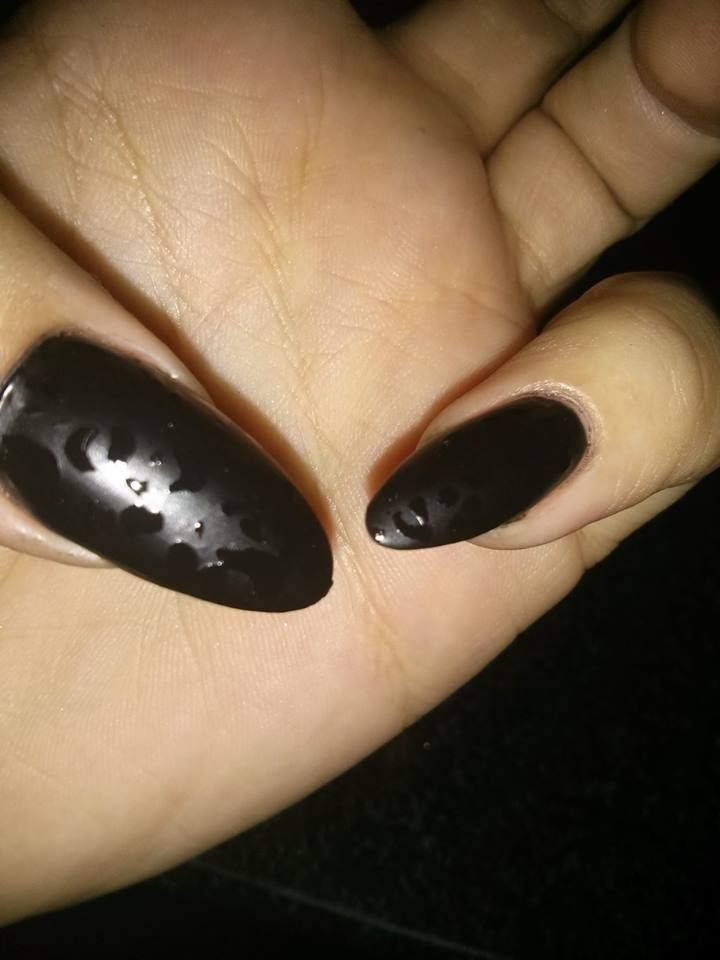

Once we're done simply apply your top coat to whichever fingers are not mattified, in this case your index, middle and ring finger and you're DONE! But be careful... It might take some time for your nails to dry completely with all these different coats of polish that we have on here. I hope you enjoy your nails as much as I do mine!


And just to show you guys a great example of what Shannon means by "YOu get more control with a nail art pen" and I will DEFINITELY use one next time I try it again, for mine I used a dotting tool and had NO CONTROL whatsoever. This is a mani that was never posted to the blog because, well, you will see in the pictures how bad it looks. This is with no clean up because I took it off right away....
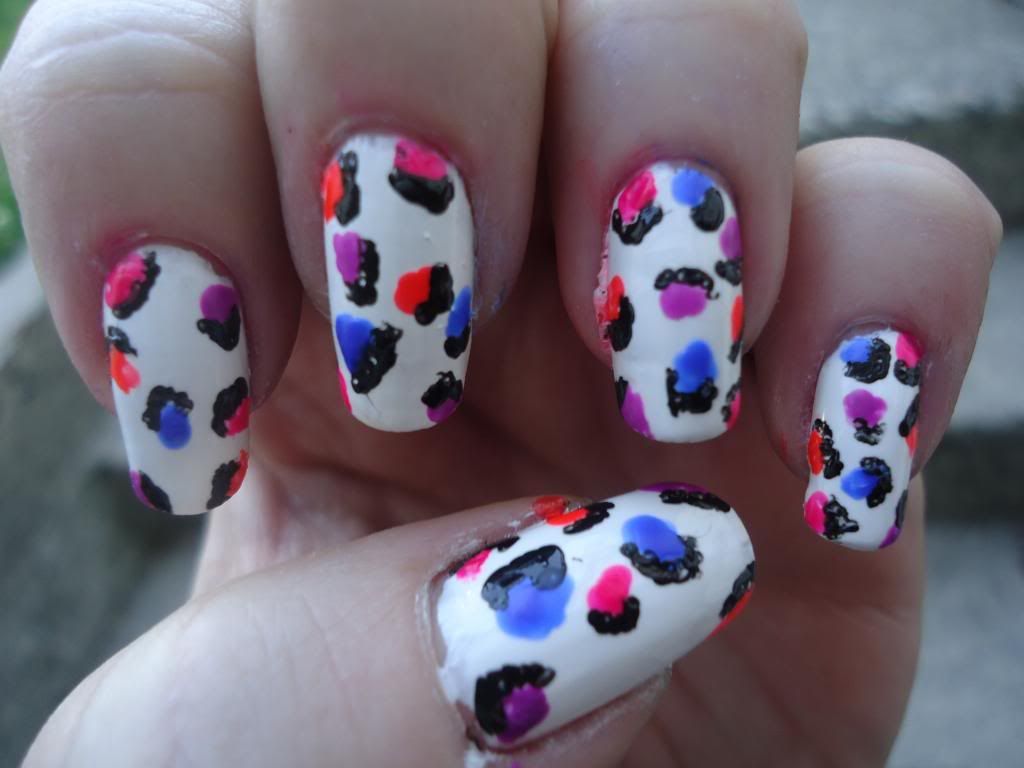
YEAH YEAH! No laughing! I told you it was a major fail on my end! :P
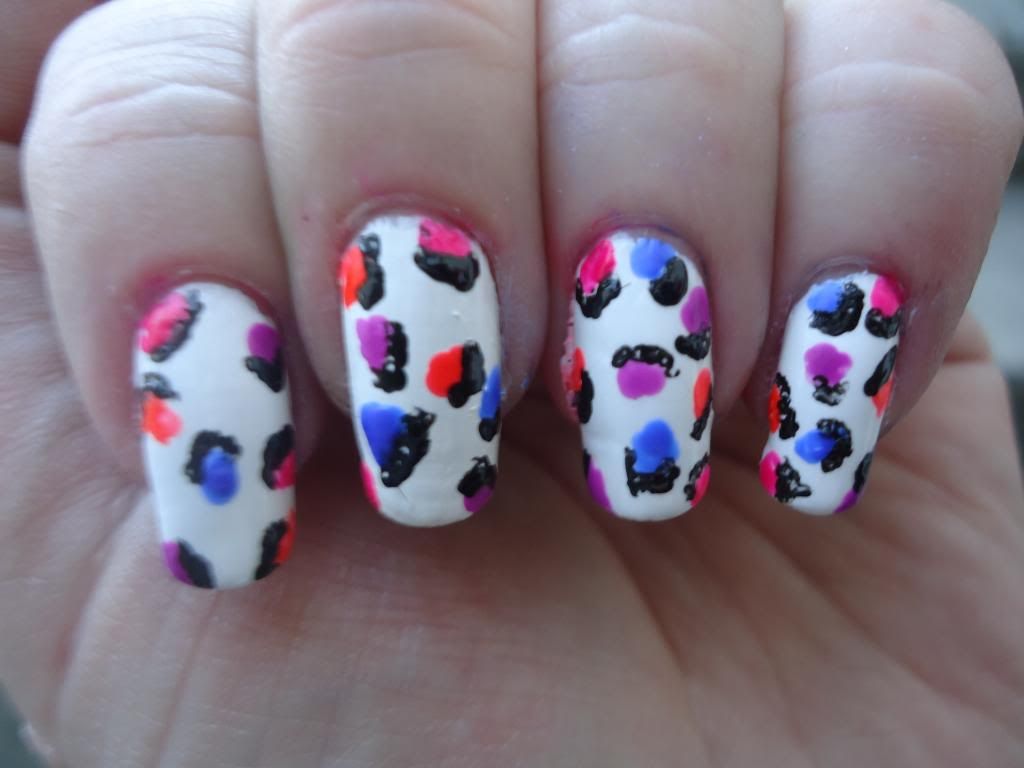

Unlike me, Shannon wasn't going for a neon, colorful print like I was. But if you wanted to, you could still follow her instructions very easily. I would just suggest that first, use your dotting tool and do colorful dots all over your nail and then use the nail art pen to draw around it. There are so many ways you can do a leopard print mani. I really like Shannon's and the way she kept it simple yet elegant and something you could definitely still wear to work! 

And there is the final product once again. She makes it seem so easy doesn't she? Well, it's not that hard.I think Shannon did a great job for her first tutorial! What do you guys think? Let me know and show Shannon some support for her first go at the blogging world:) I LOVE the final look and I love the mix of matte and creme polishes:) As I said , Shannon is not a nail blogger nor does she have any professional training. And I say that not to take anything away from her credentials but to actually add to it! All designs and mani's she comes up with all come from her mind and creativity. In fact, I believe she told me that, as I am sure a lot of you moms can relate, she usually gets to her nails when her son is in bed. That is when she gets some time to herself. So hope you guys enjoyed this post and share with me if any of you do try to do it yourself. Love to hear from all of you and promise to be back with some swatches soon:)


*All polishes used/shown in this post were purchased from said persons own pocket. Nothing was provided for review and all opinions are my own and those of my guest.

Sunday, 3 March 2013

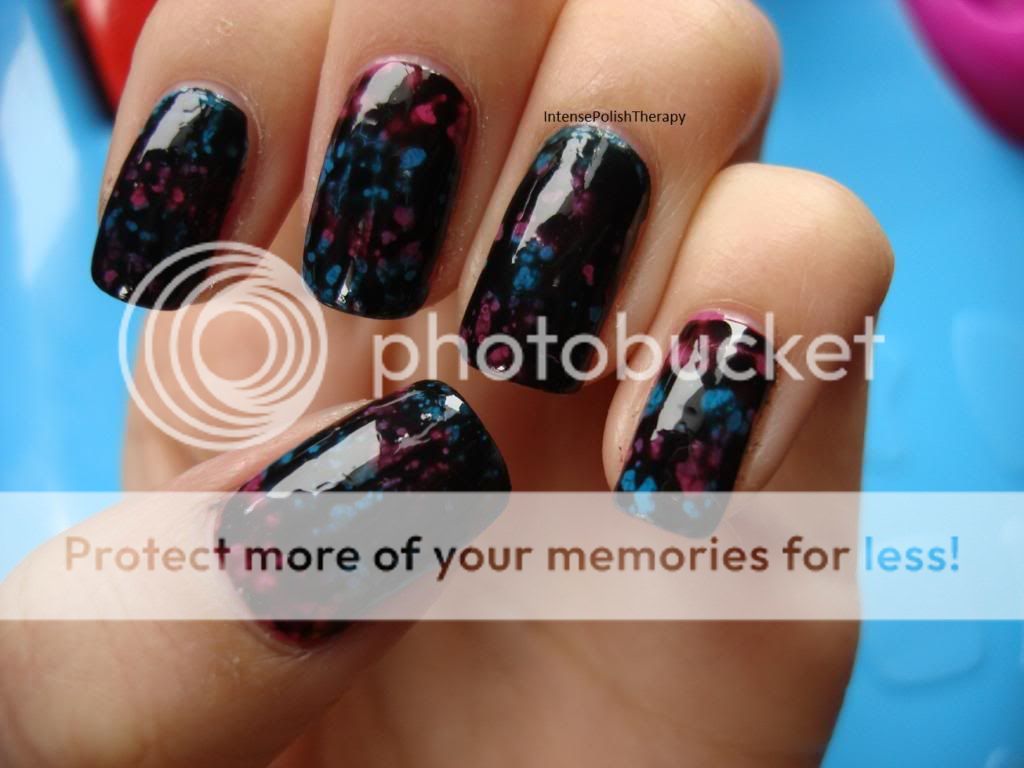
Guest post by Anita using OPI "spotted" and Essence polishes.


Before I let you all read the wonderful Anita's post I want to just say this is one of my HUGEST lemmings. I want this OPI so badly. I didn't even tell her that. She just chose this mani on her own and was thrilled with her choice. So this is a real treat today. Don't forget to check out more by Anita over on her blog and she also has a facebook page:)  Now, on to the good part...........


Hey guys! My name is Anita from IntensePolishTherapy! (=

I am so honoured to be a guest poster, I am very new to my blog so being featured on someone

else's blog is just a whole new experience
.
I have been doing a lot of indie swatching on my blog so I'm happy to have been given this


opportunity & I am hoping to run with it by doing something different. I am gonna be over

lapping some colours & then adding the super awesome OPI SPOTTED over top. So let's get started.

The first thing is the products I am using which are:


Base coat: INGLOT #04 Nail Whitener

.
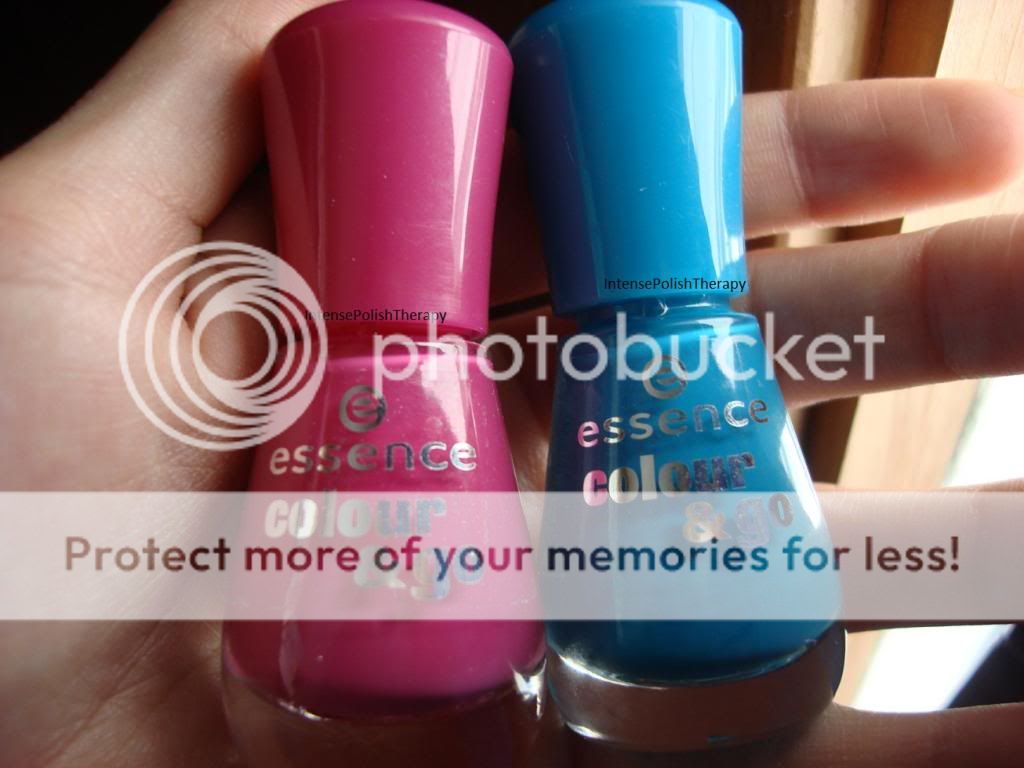
Nail Polishes Essence #108 Ultimate Pink, Essence #128 Let's Get Lost & OPI Spotted.


Top Coat: Seche Vite

Now for the how to... Of course I applied my base coat INGLOT #04 Nail Whitener, then I let it 

completely dry which was about 5 minutes (Just to be safe).


Then I started to paint my pinky using Essence #108 Ultimate Pink, wiping most of the product

off of the brush, starting at the cuticle painting about 1/4 of the way down my nail. I did the same step on my middle finger & thumb.
After that I took Essence #128 Let's Get Lost doing the same application but on my ring & pointer finger.
About another 5 minutes later starting on the pinky I took Essence #128 Let's Get Lost & started over lapping over a bit of the pink but not to much. I did this to the middle finger & thumb as well.
Next I took Essence #108 Ultimate Pink again on my pointer & ring finger I started over lapping over a bit of the the blue but not to much.
I continued doing this until I got to the free edge. Which for my nails was all together 4 times (=


After I let my nails dry I took OPI Spotted wipe both sides of the brush & applied a very thin coat of polish to my nails. Allowed them to dry for about another 5 minutes then I applied my Seche Vite for my top coat. (=


LOL well I hope I explained that well enough

that you could follow & understand what I meant.

Take care & I hope you have an awesome weekend !!


Wednesday, 13 February 2013

Guest blogger Becca from frankenfemme


Hello Nailtastic Lovelies!

  My name is Becca from Frankenfemme.blogspot.com and when Krystal
asked for a guest poster I jumped at the chance! This is my very first
guest post so I'm pretty stinkin excited! When I asked Krystal what
kind of post she was looking for she suggested possible nail art. Now,
I'm going to be honest with you guys, my heart pretty much stopped. I
am a frankener by nature so my nail art skills would be whatever is
below NONEXISTENT. But today I decided to step out of my comfort zone
to show you not only a couple of frankens, but also my attempt at
Valentine's nail art.

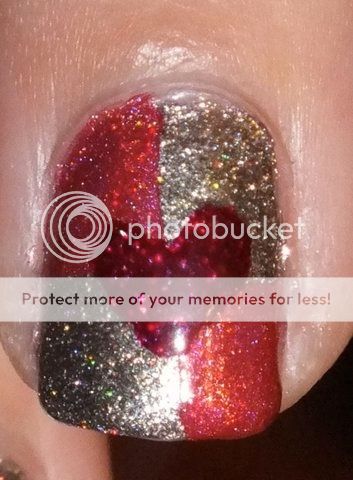
I started off with a base of a holo foil franken that I made (recipe
for the franken will be going up on my blog in the next couple of
weeks). I am IN LOVE with this franken, it's basically a one coater.
The holo is gorgeous in the sunlight while the foil still keeps it
interesting in the shade. Here is a picture of the foil in direct
sunlight:


Then, I cut up a couple of pieces of tape into the shape of square and
put them on opposite corners of my ring finger to basically create a
checkerboard pattern. I then painted the un-taped portions of the nail
with another franken, this time a pink toned raspberry linear holo
(recipe already up on the blog!). I waited about 10-15 seconds before
peeling the tape off (waiting too long will make the polish tacky and
keep you from getting crisp lines). I applied one coat of Sally Hansen
Insta-Dry and waited a couple minutes. Finally, I free handed hearts
over the checkerboard using Zoya Blaze and an unfolded paper clip
(just call me MacGuyver). Topped it off with Sally Hansen Insta-Dry
again and voila, done!


Now in no way is it the Mona Lisa of nail art, but for being a noob
such as myself I was pleased with it :)

And now for the MVP's of the game


Feel free to check out my blog for the franken recipes as well as to
find out how to make other types of polish! I'd love to see you there!
Plus, I have a giveaway ending 2/14 for a free custom full sized
franken, check it out!

Well that's all for this mani. Thank you so much Krystal for letting
me guest post! Hope you ladies have a wonderful rest of your day :)

Becca
Frankenfemme.blogspot.com

Monday, 11 February 2013

Guest Blogger: Cat's Claws - OPI "Get Your Number" Gradient

Hello all!

My name is Cat, from Cat's Claws, and I've been invited by Krystal to write this post for her blog to share with all of you!

I wanted to make sure I did something fun and new for this and I think (also known as hope) that I achieved that!

I've recently been able to get my hands on OPI's new Liquid Sand polishes from the Mariah Carey collection and I just new I'd have to do a blog post on it soon, and this presented a great opportunity for me to do just that.

I've been trying to get through some of untrieds lately, so I've been desperately trying to find ways to eliminate more than one polish at a time.  When coming up with an idea for this post I wanted to see if I could do that and then it came to me...GRADIENT!

OPI Get Your Number & OPI No Room For the Blues Gradient
So this is the result!  I uses three coats of OPI Get Your Number on my thumb, index, and middle fingers, and then three coats of OPI No Room for the Blues on my ring and pinky fingers.

Then, using a makeup sponge, I dabbed on some of the Get Your Number to the tips of my ring and pinky fingers.  To make sure the blue of the liquid sand polish showed, I painted on just a bit of it out of the bottle to the tip and kind of faded the edges with the sponge.

I'm really happy with how it turned out, and also really glad that the liquid sand polishes don't just down right annoy me, haha.  They're a neat texture and have so much more sparkle than shows up in pictures.  I had been afraid that touching anything would feel like nails on a chalkboard, but I was wrong, which was a pleasant realization.

Well, I hope you like my manicure!  I tend to not notice fails haha.  But if you did, feel free to check out my blog!  I can't guarantee its nearly as awesome as this one, but I can dream.

Let me and Krystal know what you think of this idea!

Thanks so much for having me!

Hugs & Kisses & Great Polishes!

~ Cat


Sunday, 10 February 2013

Guest post by Lisa from Geordie nails


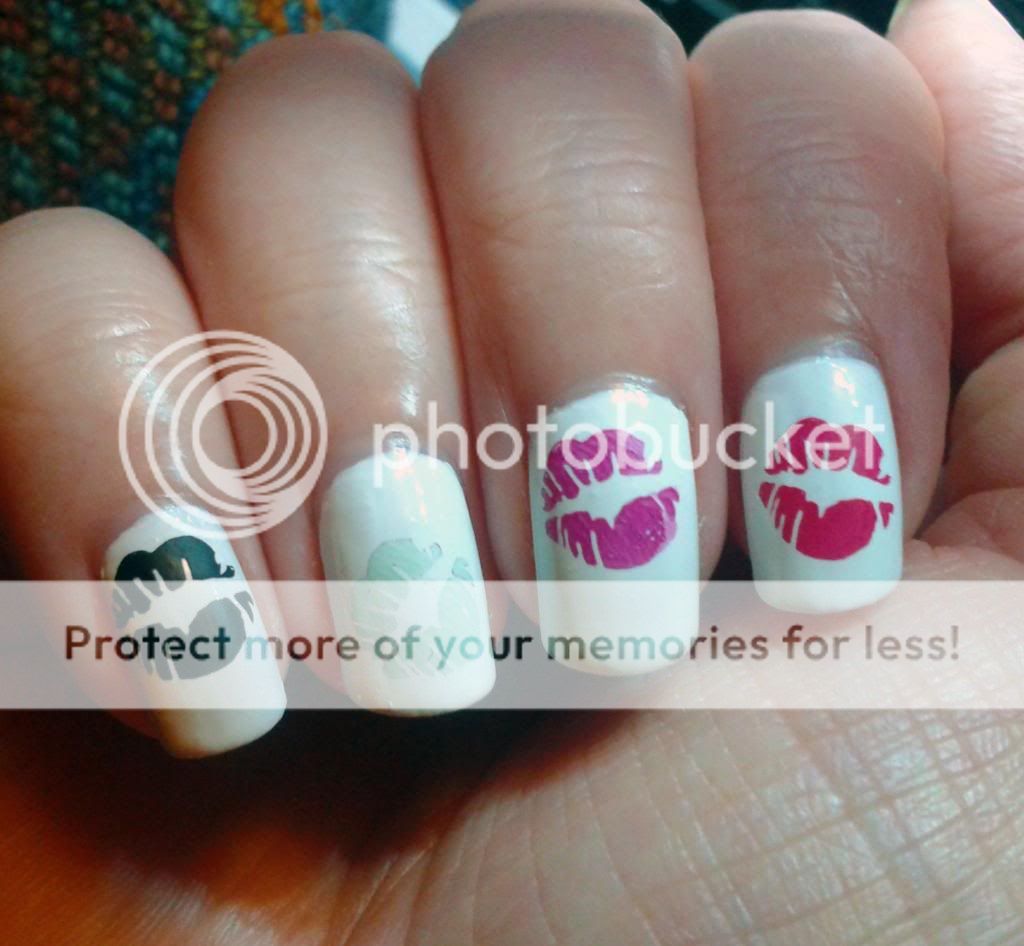
Hello! This is Lisa from the blog  Geordie nails, and I am so excited to be doing a guest post. Being an incurable night owl I was awake in the small hours, trying to think of an idea for a new mani and Krystals' invitation to write a post couldn't have come at a better time - because her Nailtastic Fun blog background instantly provided inspiration! The four coloured lipstick kisses against a white background look fantastic so I decided to stamp them on my nails. Here is my mani:


For the white base I used Revlon's 'White on White'. For the kisses I used Konad Black, Sally Hansen's 'Green Tea', Boots No7's 'Foxglove' and Barry M's 'Pomegranate'. The kiss is on stamping plate BM02 :-)
Thanks so much to Krystal for letting me post and for inspiring a manicure!
Hugs,
Lisa xx

ps. Don't forget to head on over to my blog and take a look:)

Sunday, 3 February 2013

Guest Post By Caitlin @ Epic Nail Time


Hello everybody!

I'm Caitlin! You may remember me from Epic Nail Time! I am SO happy to be guest posting over here for Krystal!  I "met" Krystal through an awesome Facebook group full of polish hoarders lovers like myself. This is my first time doing a guest post, and I'm pretty excited about it!

I stood in front of my stash hemming and hawing over what to pick for this post and finally settled on Layla Ultra Violet. This is two somewhat patchy coats with no basecoat and no topcoat. I find they apply better without a basecoat and if you sort of "float" the polish on. 


I like the colour a lot. A pretty violet-purple, silvered with all the holo particles in there. Its VERY linear! These pictures were taken indoors and there are even some double rainbows going on!


Then I thought since it is a special occasion, I would attempt a little nail art!


I used GOSH Nero to stamp the bow on my accent nail with Konad plate m56. I was pleased, it came out pretty good! GOSH Nero is my few favourite black; A one coater, inexpensive, and perfect for stamping. Then I added black rhinestones on the base of each of the other nails, and one for the knot in the bow. I think it added just enough "oomph!" to the manicure! 


So I hope you liked my manicure and I'd like to say a HUGE thank you to Krystal for letting me guest post over here! I had a ton of fun doing this manicure and writing this up :)

All the best, & even better polish,

Caitlin from Epic Nail Time :) xoxo