Fast Blinking Hello Kitty

Saturday 23 February 2013

Glitzology "Boy girl party" over Nopi "Love song"


Good evening all. Hope everyone is doing well tonight. I still don't have my camera. Seems to be taking forever!!! Since I have not been getting many more people offering to do guest spots for me, I decided to show you this mani. I was originally planning on waiting until I had mani's using all 4 of my Glitzology polishes and do one post on all of them together, but plans change:) So,  before I start I must say how awesome and nice Stacy Boyd over at Glitzology on etsy is. She was having a sale and being someone who can never pass up a sale, I decided to try out her polishes and chose "Crunch berries" and "Nebula". They arrived and whereas "Crunch Berries" was a cute, fun color and had a great quality, my "Nebula" was on the thick and goopy side. Not being sure if this is perhaps the way this polish is and if I was just being difficult, I decided to post a picture of it on one of my nail polish groups. A friend of mine who saw it, tagged Stacy, and within not even an hour she told me to message her on Etsy to work something out. Not only did she replace the bottle without any fuss , but she offered to send me another, full sized bottle, may I add, on her. Seeing as she was offering to do so, I ordered one more for myself, the gorgeous "Boy girl party" which is what I am showing you tonight. She just showed such great costumer service and has an amazing attitude and never made me feel guilty for saying something about her polish and was more then eager to help solve the situation. Just offering to replace it is something that a lot people would hesitate to do. I know one shop, which I won't mention because I am not into starting drama, made it feel like pulling teeth to replace a bottle that arrived to me half empty. I really think things like this just happen because the replacement bottle and all the other 3 polishes I own of hers are great and easy to work with. I know many other people who also have her polishes and they have no issues with it. SO I just wanted to share my awesome experience in dealing with Stacy and now onto the good stuff, her polish!!

"Boy girl party" was not one of the polishes I got in my original order. I had spent quite some time debating between it and "crunch berries" and went with the latter but am so glad I did get it. IT ended up being my favourite. It goes great with so many colors but I went with purple. Here's the polishes I used.


Boy girl party: Who can explain it better then Stacy herself, so taken from her description on Etsy, "This color reminded me of being young and being invited to my first "boy girl party". HaHa, those were the days! This polish is a mix of bright blue, white, and pink. It features a wide variety of shapes and sizes of glitter, including squares, hexes, bars, and even some stars!"


Nopi "Love song" from the Selena Gomez collection: a soft, creme lilac, perfect for Spring. Great formula, I used two coats.


So, onto my nails. I LOVE the way this came out. As I said, I could see this polish over a lot of other colors. I contemplated a bright pink or a light blue but glad I went with purple:)


I wasn't able to get the best pics this time around:( I hate the lighting in some of these. In some the purple looks darker but the lighter ones are truer to its real life look.

Anyone who known me well knows I LOVE blue and I love stars. Perhaps that is why this polish appeals to me so well. They also spread on nice and easily. No fishing needed.


I know we can all see that little white piece on my middle finger sticking out. Its my fault for adding another coat on that finger after I had already added my top coat and not adding another one.


And so , there you have it. Hope you guys enjoyed this mani as much as I did. And I strongly suggest you go on over to Glitzology on etsy and have a look at all her polishes. There are so many pretties, it's hard to choose. I will definitely be buying more.

Do you own any of her polishes?? If so, which ones? What color would you use it with?? Or would you try it alone??
Love to hear from all of you and hope to have my camera back soon and can't wait to show you the rest:) 

Till next time,
             Krystal


Monday 18 February 2013

Over the top Valentine's Day nails.


Hello all,
So glad I am able to say hi and have pictures to follow. IF you do follow my blog, and I hope you do, you will know that my camera is in the shop and I have been having guest bloggers help me out . The experience has been just great and it is still open to all. I have been quite impressed with all that they have offered. My camera broke and it is in being fixed. Since it is being fixed on the warranty (MUST add that I got it in 10 days before the warranty expired. Can you believe that?? Usually it is the other way around! But since it is on the warranty they gave me a time frame of 6-8 weeks so I am stuck not being able to take pictures. I could go back to the old way I took pictures. IF you look at my oldest posts, you will see what I mean. You will also agree that doing so is not a good idea. I can't believe they used to look like that....
BUT my very dear friend did lend me her camera for a couple of nights so I was able to take pic of my Valentine day mani and a couple more but that is about my Valentine's Day mani. So, I saw so many everywhere and they were all so pretty and inspirational and I must admit, I was overwhelmed. I did not know what to do. I knew I wanted to use red or pink and finally decided on pink. I am not a big pink fan. In my everyday life  it would be odd if you saw me wearing pink. Just not my thing. I do, of course, own a ton of pink polish...That does make sense, right?? HAHA! Anyhow, I have tons, many are untrieds, so it is what I went with. Next  was, WHAT THE "F" AM I GOING TO DO??? So, when you have a bunch of ideas in the old noggin, why not use them all? I did. So, you will see a water marble, a fan brush technique, (I been wanting to try forever, but was not sure if it was as easy as all the tutorials looked so 2 nails is easier to try out then all 10)  andgot some use out of my fimo slices and a hello kitty decoration. This mani is WAY over the top. Certainly not something I would wear everyday. Just not my style. But is was Valentine's day and I wanted to have some fun. I also did enter it into a competition over on the great Jen's facebook page, jen's nail files. Anyhow, onto the mani.

As I said, I used nothing but pink. I tried to do a sort of skittles type thing with pink. Starting with the darkest pink on my thumb and the lightest on my pinky. So, I will start with what I used on my thumb which was..

Thumb
OPI "Kiss me on my tulips": From OPI's Holland collection,  it is a hot pink, berry creme ,with a bit of a blue undertone. Since I knew I would be adding to my nails, I was not adding a top coat until I was done so I was a bit worried/annoyed that the drying time would take a while before I could get started. However, the drying time was great and it was opaque in two coats. One thick coat would most likely do the trick but I never just do one....


Index finger
Essie "Lights": From the Poppy-Razzy collection,  which was a neon set, is a bright, electric pink. If you look closely it does have a slight purple undertone. It is a gorgeous pop of neon pink and I was not going to use it at first seeing as only one neon would probably seem out of place. However, this polish is not as "neon" as the collection would lead you to believe. It was recommended to wear over a white and maybe it looks more neon that way but for this mani, it was a great pink and not too "neon"


Middle finger:
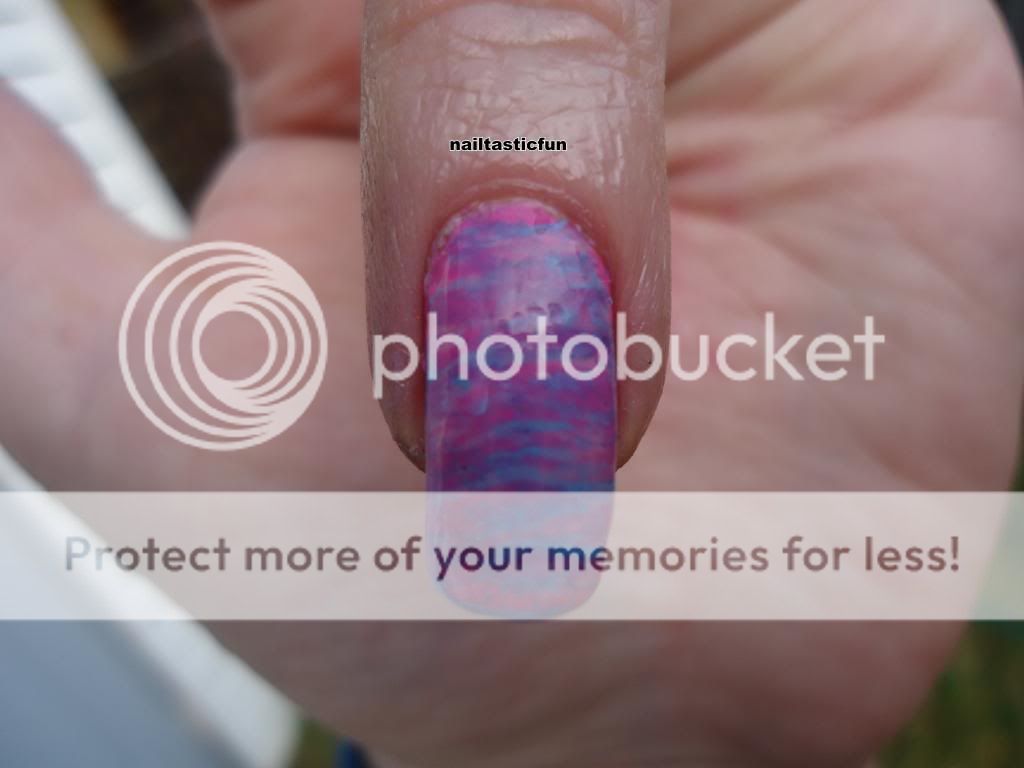
OPI  "If you moust  you moust": From the Minnie mouse collection, is a vibrant, blue based pink. But to girls saying " I want pink, no blue," it is something that is not really noticeable to the naked eye. To people examining it and trying to describe it, yeah. But, Now, as I said, I am not a pink person and this is the pink I would probably stay away from the most in clothes as it is a really bright and "barbie" pink. If you are thinking pink, this is most likely what you're thinking of. I have 2 coats on but was opaque with one.
OK so this is a terrible picture to show the pink since I did the brush technique BUT the pink you do see, is the one I am talking about.....


Pinky finger:
Essie:"Need a vacation": The lightest of all my pinks (unless I go into my really sheer polishes. Not counting the ones with VNL) I had never even heard of this one. If you take a look at my stash list, you will see how much I love Essie and how many I own. But seeing as my polish "obsession" is just over a year old (meaning, blogging, finding out there is a whole community...) I did not notice collections as much and never noticed this one. Perhaps because it is older but I did find it a tad hard to work with. It was runny and patchy. But after adding a coat, waiting a minute and repeating 3 times, it was fine and the color was a "bright bubble gum pink" .
Not sure why I don't have a better pic of this nail alone...it is blurry but.... Here it is


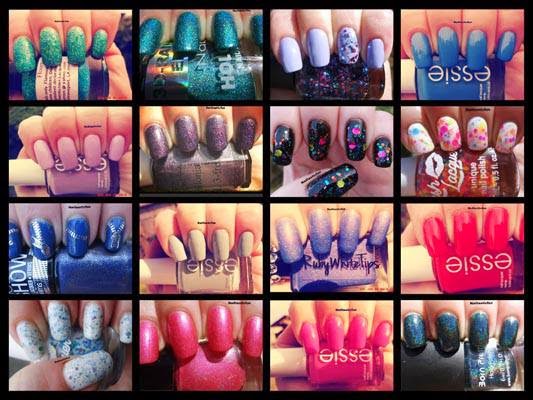
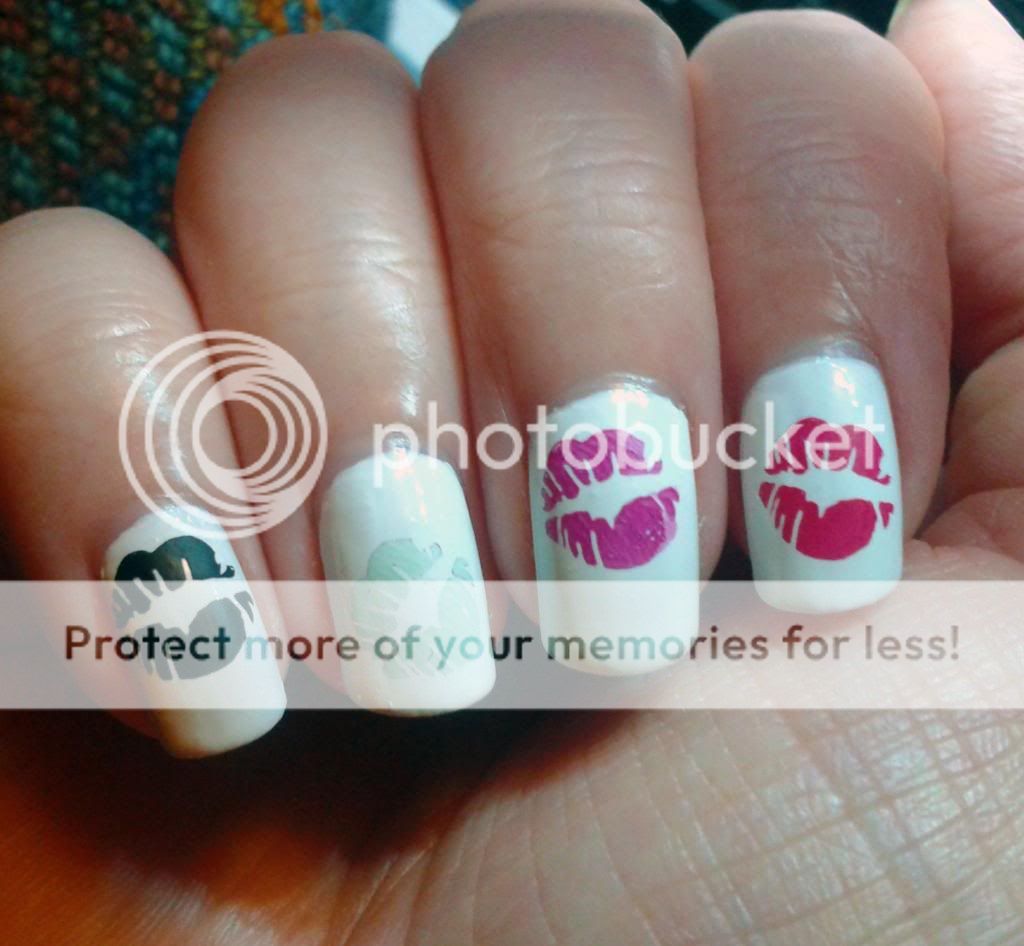
So, on to the pictures, which is the best part....


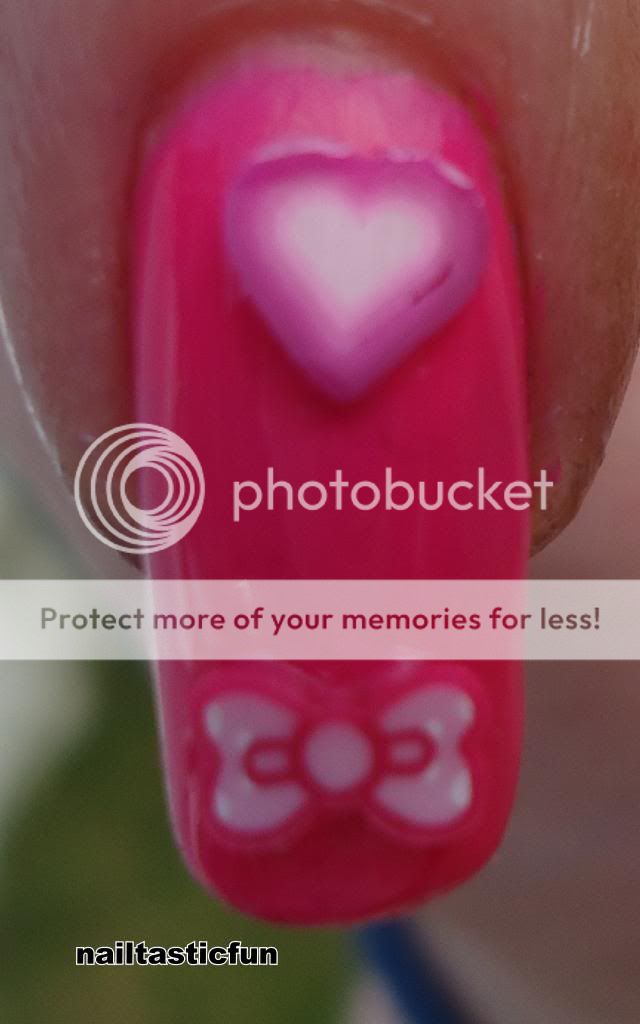
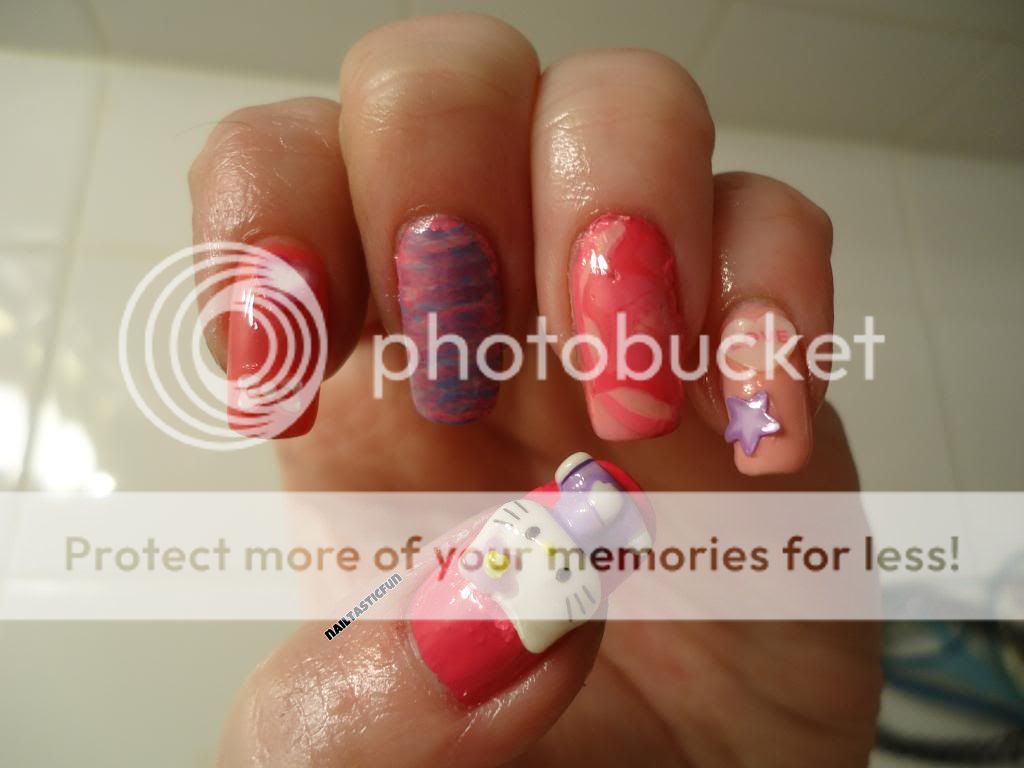
So, yeah, these are all the nails. On the thumb I added a Hello Kitty art decoration piece(not sure what else to call it) I got it off ebay. I have ten purple and 10 blue. Must say, they are a bit awkward to wear. However, not as much as the fimo slices. AS a girl with long hair, I am always putting it in a pony tail, taking it down, I am just , with such THICK hair,  always doing something with it and the fimo slices, even though I added it on top of a fresh coat of seche vite , with tweezers and once they were on I used the tweezers and pressed the fimo slices hard onto the nail, the edges did stick out, not a lot but just enough for your hair to get caught in them. That, I must admit, was ANNOYING! I was actually worried that the Hello Kitty would not stay on too long ( I used a gel glue that I got with a set of fake nails I got from the dollar store, believe it or not) but it stayed on without any issues until I took it off. It is the fimo slices that, on my index finger, fell off the next day. The pinky was fine but, for some reason, even with a lot of seche vite as a base and top, they fell off....


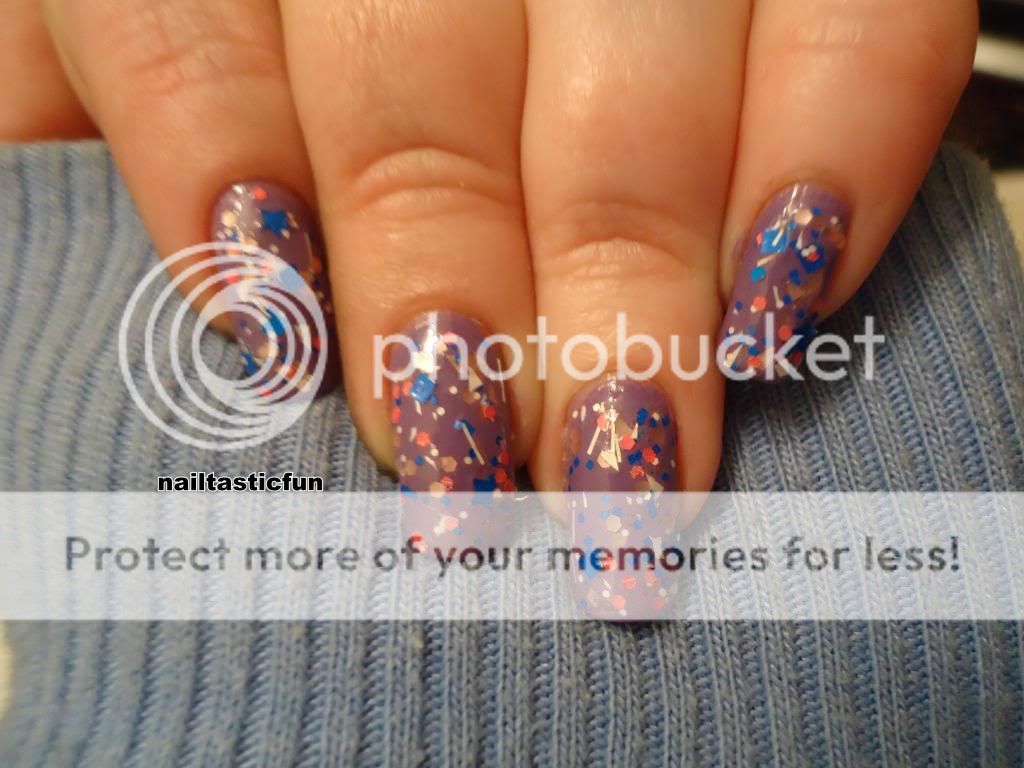
So, as I said, I did a few things. The index and pinky, I just added the fimo slices. As I said, I added a top coat over my polish, then quickly added the slices with a pair of tweezers. The middle finger, I did the "fan brush" mani. If you look up tutorials, they look so easy so I had my doubts but it actually is easy and I love the way it looks!!! My ring finger is water marble. This is actually my second try. I don't know what it is, but if you know the technique to water marble (if not, google it and a lot of tutorials will show up) you add each color into water, one at a time, and they will make rings. Well, mine don't make perfect rings. They just don't  They are small and....UGH! its not perfect, but I just keep adding drops into the tiny circles (they should be big) and the I take a toothpick and TRY to make a design.....


 These are my nails, outside. Yes, it is in the sun but, not a sunny day. It was a gloomy, grey day...

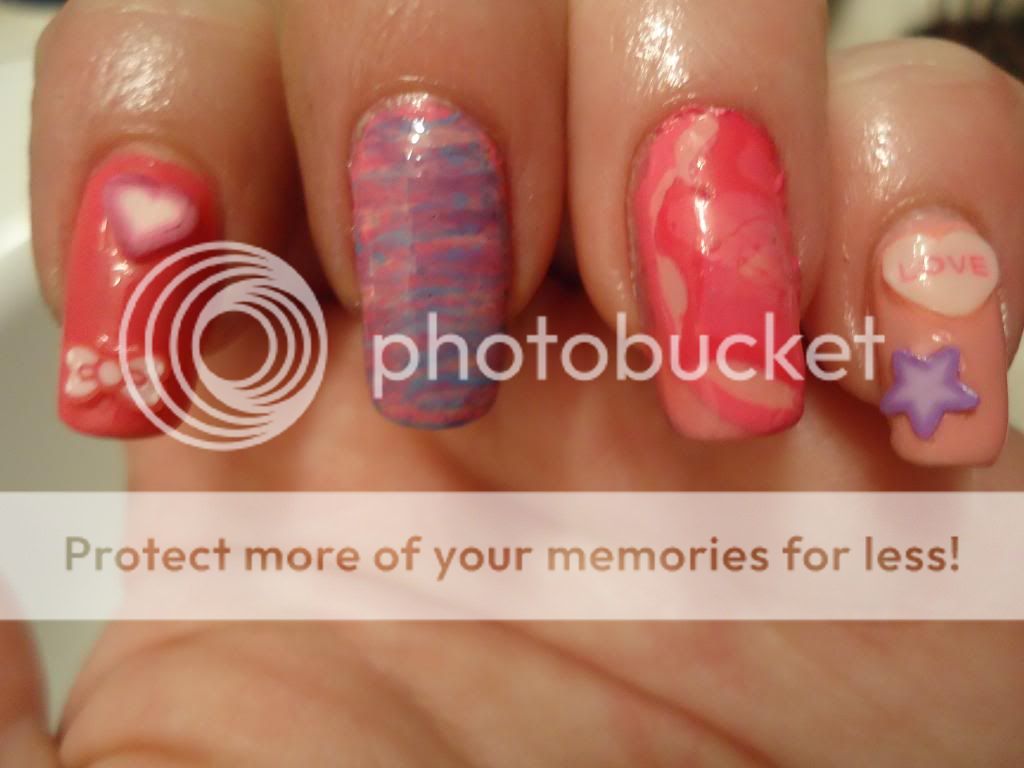
If you know me well, you know I LOVE Hello Kitty. As I mentioned I got these off of ebay and have yet to use them and this seemed like the perfect time. I was going to just add it with a top coat but I was told it needs glue to stick. So, as I said, I used some gel glue and it stuck. Only issue, as you can see on the top of it, is that, when you put it on and then move it, albeit slightly,  it moves the wet polish as well which is why you can see a bump right on top of it. That was the best I could make it look...


Pictures taken inside....


Well, there you go. Those are my Valentines day nails. As I said, these are way over the top for me. Would you guy sever wear nails like these?? What do you think of the Hello Kitty decoration?? Too much??? What do you think of my full mani?? Is it too busy?? Hard to concentrate on one thing?? Or does it look fun and perfect for a holiday mani??
Have you guys been enjoying my guest bloggers? I hope you take the time to go follow their blogs. They are all such wonderfully talented ladies who helped me out for nothing in return. I am ever grateful. And I am still needing more guests. I have a post about it so if you are interested, please don't be shy. Even if you don't have a blog, just get your feet wet. I am not fussy, do anything you want. If you are too shy to comment here email me then at krystalkesson@yahoo.ca

So, I have a couple more manis I did this weekend while I had the camera, but,it will still be a bit until I get it back. I am late but happy Valentines Day. My parents are divorced BUT, if they had stayed married, this year would have been their 37th year anniversary...
Love to hear from all of you and I don't get much comments. Guess not many people look at my blog...LOL.. Ah well, I have fun. But if you are here, let me know by telling me what you think of my mani. And be honest, I wont get insulted. I would hate it more if you lied.
Talk to you all soon!

And remember, stay drama free but never polish free!!!

Wednesday 13 February 2013

Guest blogger Becca from frankenfemme


Hello Nailtastic Lovelies!

  My name is Becca from Frankenfemme.blogspot.com and when Krystal
asked for a guest poster I jumped at the chance! This is my very first
guest post so I'm pretty stinkin excited! When I asked Krystal what
kind of post she was looking for she suggested possible nail art. Now,
I'm going to be honest with you guys, my heart pretty much stopped. I
am a frankener by nature so my nail art skills would be whatever is
below NONEXISTENT. But today I decided to step out of my comfort zone
to show you not only a couple of frankens, but also my attempt at
Valentine's nail art.

I started off with a base of a holo foil franken that I made (recipe
for the franken will be going up on my blog in the next couple of
weeks). I am IN LOVE with this franken, it's basically a one coater.
The holo is gorgeous in the sunlight while the foil still keeps it
interesting in the shade. Here is a picture of the foil in direct
sunlight:


Then, I cut up a couple of pieces of tape into the shape of square and
put them on opposite corners of my ring finger to basically create a
checkerboard pattern. I then painted the un-taped portions of the nail
with another franken, this time a pink toned raspberry linear holo
(recipe already up on the blog!). I waited about 10-15 seconds before
peeling the tape off (waiting too long will make the polish tacky and
keep you from getting crisp lines). I applied one coat of Sally Hansen
Insta-Dry and waited a couple minutes. Finally, I free handed hearts
over the checkerboard using Zoya Blaze and an unfolded paper clip
(just call me MacGuyver). Topped it off with Sally Hansen Insta-Dry
again and voila, done!


Now in no way is it the Mona Lisa of nail art, but for being a noob
such as myself I was pleased with it :)

And now for the MVP's of the game


Feel free to check out my blog for the franken recipes as well as to
find out how to make other types of polish! I'd love to see you there!
Plus, I have a giveaway ending 2/14 for a free custom full sized
franken, check it out!

Well that's all for this mani. Thank you so much Krystal for letting
me guest post! Hope you ladies have a wonderful rest of your day :)

Becca
Frankenfemme.blogspot.com

Monday 11 February 2013

Guest Blogger: Cat's Claws - OPI "Get Your Number" Gradient

Hello all!

My name is Cat, from Cat's Claws, and I've been invited by Krystal to write this post for her blog to share with all of you!

I wanted to make sure I did something fun and new for this and I think (also known as hope) that I achieved that!

I've recently been able to get my hands on OPI's new Liquid Sand polishes from the Mariah Carey collection and I just new I'd have to do a blog post on it soon, and this presented a great opportunity for me to do just that.

I've been trying to get through some of untrieds lately, so I've been desperately trying to find ways to eliminate more than one polish at a time.  When coming up with an idea for this post I wanted to see if I could do that and then it came to me...GRADIENT!

OPI Get Your Number & OPI No Room For the Blues Gradient
So this is the result!  I uses three coats of OPI Get Your Number on my thumb, index, and middle fingers, and then three coats of OPI No Room for the Blues on my ring and pinky fingers.

Then, using a makeup sponge, I dabbed on some of the Get Your Number to the tips of my ring and pinky fingers.  To make sure the blue of the liquid sand polish showed, I painted on just a bit of it out of the bottle to the tip and kind of faded the edges with the sponge.

I'm really happy with how it turned out, and also really glad that the liquid sand polishes don't just down right annoy me, haha.  They're a neat texture and have so much more sparkle than shows up in pictures.  I had been afraid that touching anything would feel like nails on a chalkboard, but I was wrong, which was a pleasant realization.

Well, I hope you like my manicure!  I tend to not notice fails haha.  But if you did, feel free to check out my blog!  I can't guarantee its nearly as awesome as this one, but I can dream.

Let me and Krystal know what you think of this idea!

Thanks so much for having me!

Hugs & Kisses & Great Polishes!

~ Cat


Sunday 10 February 2013

The Clockwise Nail Polish: 250th Blog followers Giveaway

The Clockwise Nail Polish: 250th Blog followers Giveaway

Go and follow blog and join awesome giveaway:) Good luck!

Guest post by Lisa from Geordie nails


Hello! This is Lisa from the blog  Geordie nails, and I am so excited to be doing a guest post. Being an incurable night owl I was awake in the small hours, trying to think of an idea for a new mani and Krystals' invitation to write a post couldn't have come at a better time - because her Nailtastic Fun blog background instantly provided inspiration! The four coloured lipstick kisses against a white background look fantastic so I decided to stamp them on my nails. Here is my mani:


For the white base I used Revlon's 'White on White'. For the kisses I used Konad Black, Sally Hansen's 'Green Tea', Boots No7's 'Foxglove' and Barry M's 'Pomegranate'. The kiss is on stamping plate BM02 :-)
Thanks so much to Krystal for letting me post and for inspiring a manicure!
Hugs,
Lisa xx

ps. Don't forget to head on over to my blog and take a look:)

Guest posts open to all

Hello all:) So, as you may have noticed, I have been having guest posts since my camera is currently in the shop being fixed. Its being fixed on the warranty ( I got it in 10 days before it expired ! that usually never happens. Usually have problems 10 days after!) so it can take up to 8 weeks. I didn't want to have the blog dead all that time so I have asked people to be guests for me. Anyone is welcomed and there is no format to follow. Can be anything you want (to do with nails/beauty). Any polish, any art, anything! I love it all and appreciate all the help! So if anyone would also like to help me out and do a post for me, leave me a comment on here or e-mail me at krystalkesson@yahoo.ca. If you have a blog, its a chance to share it with new people. It doesn't matter if you don't have a blog either. Maybe you would just like to dip your toes into blogging or have a polish/mani you're proud of and would like to show of.  Either way, I welcome and encourage everyone to join in the fun. Hope to hear from a few of you!!!!

Hope my camera gets fixed ASAP! I have some new Glitzology polishes I am dying to show you guys. Along with Nopi "Selena Gomez" and "Modern family" polishes. Some new Zoya's and an OPI sand art:) So, I have those to look forward to posting for you guys. Until then, enjoy all the wonderful ladies who are helping me out and please remember to take the time and go visit and follow their blogs;)

Thanks all:) And keep on polishing:)
                                                            Krystal
                                                                              xxx

Wednesday 6 February 2013

More Guest Blogger Fun

Hi little nailtastic fans!

My name is Briana and when Krystal asked me if I was willing to do a blog guest spot while her camera was out of action I jumped at the chance to help her out. Shes such a sweetie pie.
Ive been blogging over at For The Love Of Lacquer for a while and this is my first ever blog guest spot.

Today I decided to review one of my untrieds from LynBDesign. I recently got a set of 3 from her and this is the last one Ive got left to try out.

Time and Relative Dimension In Space is from her Dr Who collection, Im not a fan of Dr Who (never watched it sorry Who fans) but I am a fan of gorgeous sparkly blue polishes so this one was a no brainer for me.

I have to say out of the three I got this is probably the problem child of the group. I didn't realise when I got it that its a jelly, I don't mind jellys but I don't go out of my way to buy or use them so I don't have a lot of practise in using them and I think a jelly is something you need to practise to perfect the art of applying them well.

Time and Relative Dimension In Space is a deep dark blue with blue and silver small glitter throughout, as a jelly it is rather sheer, but the glitter is choc packed, you get a really good even coverage of glitter without having to work for it and I love that.


This was one coat of Time and Relative Dimension In Space, if I had of been able to get an even layer I would have loved to leave it like this with a white or nude background 

This is Time and Relative Dimension In Space with three coats, two probably would worked fine, but I wanted the extra depth of three. 


This was a bit of a nightmare with application, it might be because I'm just not use to jellys, they are thin and runny but thick at the same time and I don't use them often enough to be able to apply them with ease so maybe with practise or someone more skilled than I it would result in a better smoother application. Also the other LynBDesigns Ive tried don't have any application issues, her Passing Go is a dream and Sassy Snow Pants gives great glitter coverage.

Ive also noticed some shrinkage around the tips but I am blaming this on the new express dry drops I am trialing

LynBDesigns can be found on esty at http://www.etsy.com/shop/LynBDesigns and if you rush over right now she has a great buy 2 get 1 free sale! 
If your looking for more reviews of her polishes you can check out my swatches of Passing Go and Sassy Snow Pants on my blog www.briesvernis.blogspot.com 

Hope you enjoyed my little guest blog and Im sure Krystals camera will be back in action shortly!
Thanks :)


Sunday 3 February 2013

Guest Post By Caitlin @ Epic Nail Time


Hello everybody!

I'm Caitlin! You may remember me from Epic Nail Time! I am SO happy to be guest posting over here for Krystal!  I "met" Krystal through an awesome Facebook group full of polish hoarders lovers like myself. This is my first time doing a guest post, and I'm pretty excited about it!

I stood in front of my stash hemming and hawing over what to pick for this post and finally settled on Layla Ultra Violet. This is two somewhat patchy coats with no basecoat and no topcoat. I find they apply better without a basecoat and if you sort of "float" the polish on. 


I like the colour a lot. A pretty violet-purple, silvered with all the holo particles in there. Its VERY linear! These pictures were taken indoors and there are even some double rainbows going on!


Then I thought since it is a special occasion, I would attempt a little nail art!


I used GOSH Nero to stamp the bow on my accent nail with Konad plate m56. I was pleased, it came out pretty good! GOSH Nero is my few favourite black; A one coater, inexpensive, and perfect for stamping. Then I added black rhinestones on the base of each of the other nails, and one for the knot in the bow. I think it added just enough "oomph!" to the manicure! 


So I hope you liked my manicure and I'd like to say a HUGE thank you to Krystal for letting me guest post over here! I had a ton of fun doing this manicure and writing this up :)

All the best, & even better polish,

Caitlin from Epic Nail Time :) xoxo